Login to your NextPBX dashboard.
In the left-hand menu, click on the number you want to setup.
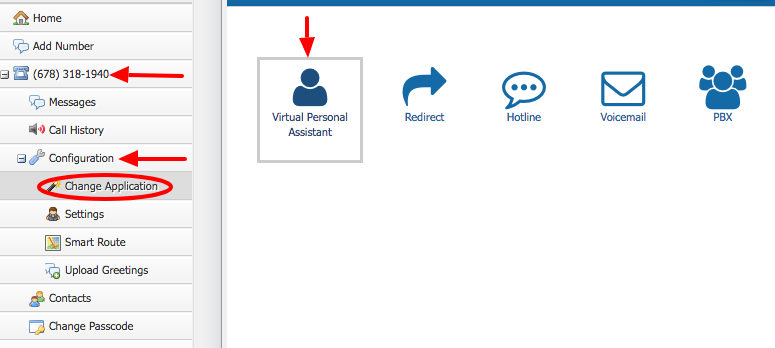
Click on Configuration, then click on "Change Application."
You'll see five icons representing the five main applications we have. Click on the "Virtual Personal Assistant" icon. A dialog window will pop up.
From here you can change:
- The first and last name of the mailbox owner;
- The time zone the owner is in;
- The number of rings callers will hear before they hear your voicemail (recommendation: 1)
- Enable advanced email options that will allow you to customize special email templates to use. Click on the "Advanced Email" tab in the Settings section to configure it.
- The email address you would like voice and fax messages to be sent to.
Click the Next button. Step 2 of the setup sets:
- The file format of the voicemail (mp3 or wav);
- The file format of the faxes (pdf or tif);
- The ability to listen or view voice and fax messages from the dashboard;
- How many days you want the new messages kept (0-9);
- How many days you want the saved messages kept(10-90);
Click the Next button. Step 3 of the setup will allow you to change your status: Cell, Do Not Disturb, Home, Meeting, Vacation, Travel or Work.
Click the Next button to go to Step 4. Depending on what you chose in Step 3, the setup will then ask for different information. Go through each question and then click the Save button.
You'll get a confirmation dialog box asking if you're sure that all your changes are correct; if they are, click Yes. Clicking No will take you back to Step 4. A dialog box will appear verifying that the changes were made.
Be sure to upload a greeting for any statuses that require a greeting, such as Do Not Disturb, Meeting and Vacation.
NOTE: To keep your system in Virtual Personal Assistant mode, make sure that it is highlighted in the main menu under "Change Application."